Got a couple of spare hours and an empty wall? This easy DIY wall mural frame is the perfect project for you.
If your bland, monotone walls need some cheering up, an eye-catching wall mural might be just what you need. Whether it’s a peek into a rugged mountainous landscape or a gateway to the cosmos, your choice of mural can be a powerful expression of your distinct style and a conversation starter for years to come.
“Is that a window into another world? Or is that breathtaking landscape a hanging wall mural?” your guests will inquire.
Display your favorite wall mural in a stunning, custom-built frame, providing a polished, refined appearance. This project is suited for DIY enthusiasts of all levels, from beginners to seasoned crafters. Not only is it an affordable way to elevate your home decor, but it also provides a satisfying hands-on experience. This article provides comprehensive instructions for crafting a custom DIY frame, covering all the essential steps from the initial measuring of the molding to hanging the finished frame.
Follow this guide to create a beautiful DIY frame in just a day, with tools you may already have at home. There’s minimal investment, no need for power tools, and it can be adjusted to any size mural, making it the perfect weekend activity!
Project Overview:
– Working Time: 2 hours
– Total Time: 1 day, 2 hours
– Skill Level: Beginner
– Total Cost for all Materials: $60
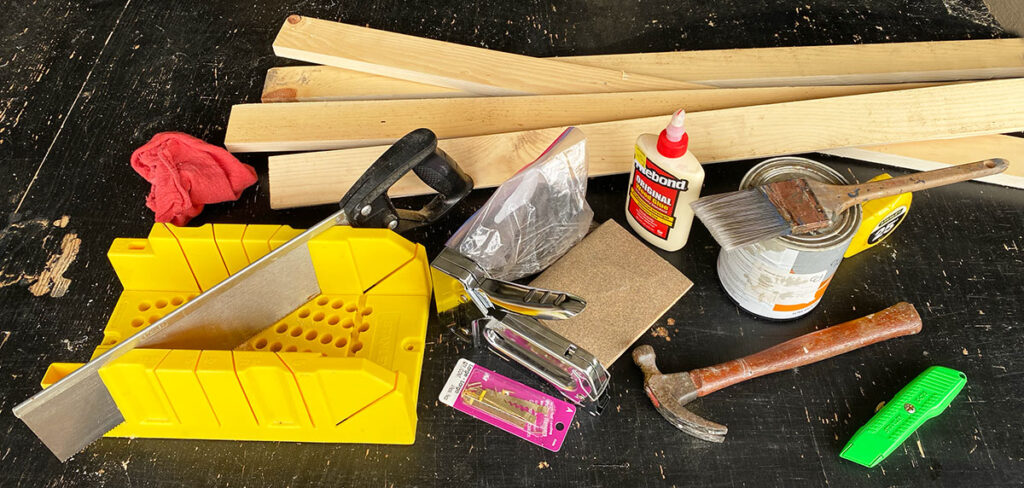
What You’ll Need:
Measuring tape
Pencil
Clamps
Cloth
Staple gun
Hand saw and miter box
Picture frame molding
Sandpaper
Wood glue
Picture hanger hardware
Cardboard or foam board
Got a couple of spare hours and an empty wall? This easy DIY wall mural frame is the perfect project for you.
If your bland, monotone walls need some cheering up, an eye-catching wall mural might be just what you need. Whether it’s a peek into a rugged mountainous landscape or a gateway to the cosmos, your choice of mural can be a powerful expression of your distinct style and a conversation starter for years to come.
“Is that a window into another world? Or is that breathtaking landscape a hanging wall mural?” your guests will inquire.
Display your favorite wall mural in a stunning, custom-built frame, providing a polished, refined appearance. This project is suited for DIY enthusiasts of all levels, from beginners to seasoned crafters. Not only is it an affordable way to elevate your home decor, but it also provides a satisfying hands-on experience. This article provides comprehensive instructions for crafting a custom DIY frame, covering all the essential steps from the initial measuring of the molding to hanging the finished frame.
Follow this guide to create a beautiful DIY frame in just a day, with tools you may already have at home. There’s minimal investment, no need for power tools, and it can be adjusted to any size mural, making it the perfect weekend activity!
1. Measure Your Mural
Already chosen your wall mural? You can view your order online to see the specific dimensions. Alternatively, use a tape measure to determine the dimensions of your Biggies Wall Mural. These measurements will dictate the size of both the frame and its backing, and will help with determining how much molding you’ll need.
2. Calculate the Molding Length
Grab your picture frame molding. The amount you’ll need can be determined by adding the lengths of all 4 sides of the mural, plus an extra 24 inches. This can also be explained as (2l + 2w) + 24 = molding length.
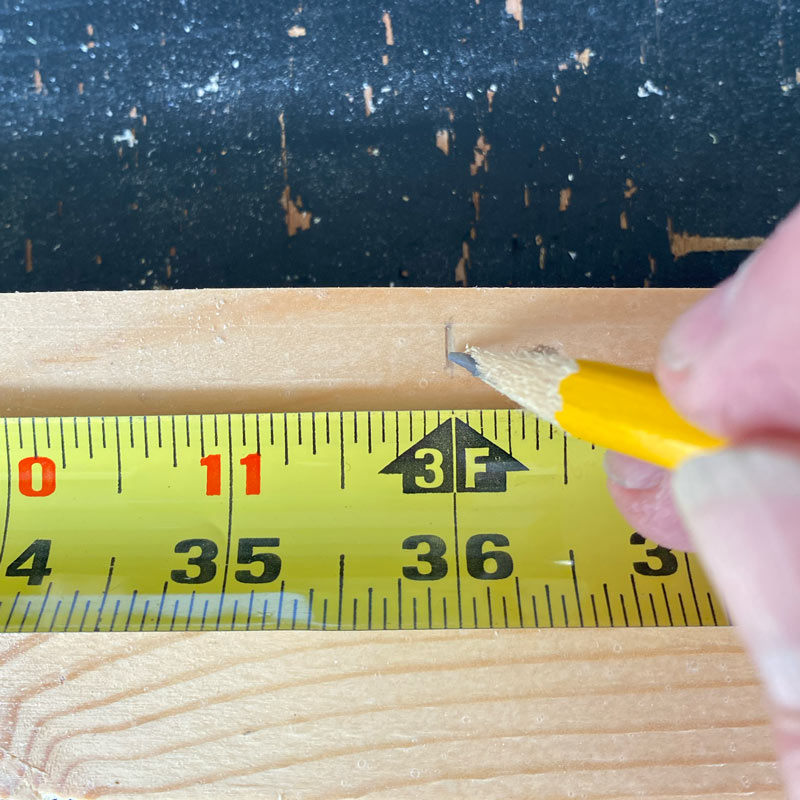
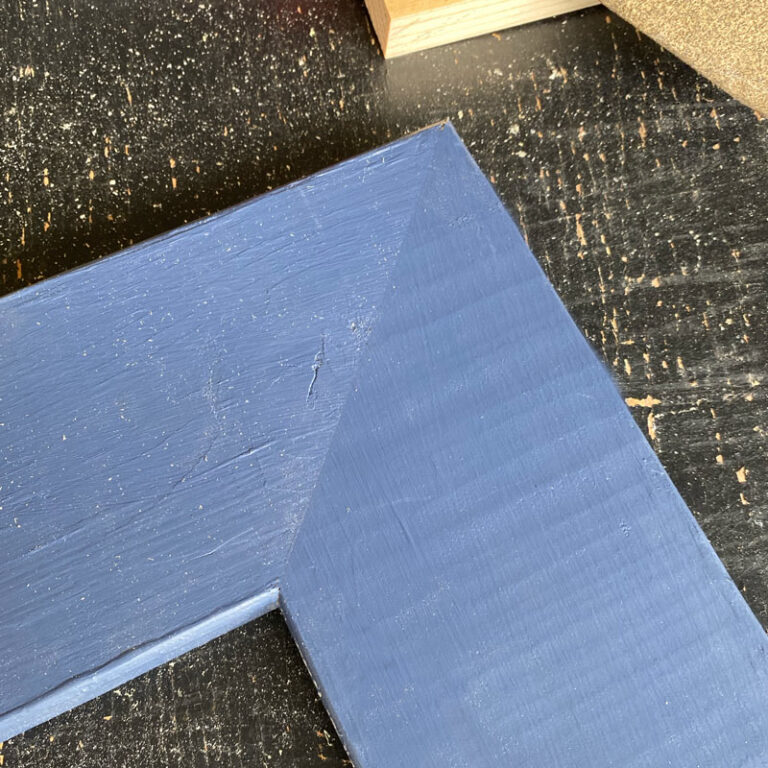
3. Mark and Cut the Moulding
With a pencil, mark the lengths on your molding, adding 3 inches to each piece for the 45-degree miter cuts. Place the molding in the miter box and grab your hand saw. Prepare to cut at a 45-degree angle at the marked locations. Ensure the cuts on each piece of molding angle down in opposite directions to form the corners of your frame. In other words, for the adjoining pieces to fit together seamlessly at each corner, the first piece is cut with a 45-degree angle that slopes downward to the left, and the second piece is cut with a 45-degree angle that slopes downward to the right. When you bring these two pieces together, the angles should match up perfectly, creating a neat, mitered corner that forms a 90-degree angle. Alternatively, most hardware stores can make the cuts in-store, which can be a great option if this DIY is a first-time project.
4. Sand and Clean
Once cut, sand the edges of each piece of molding to smooth out any roughness. This prepares the molding surface for a more even application of paint or stain. An electric sander can be used for a quicker, more thorough process. Shake off any dust that accumulates before painting. A damp cloth can help with removing the fine dust particles. Ensure each piece of molding is completely dry before moving to painting.
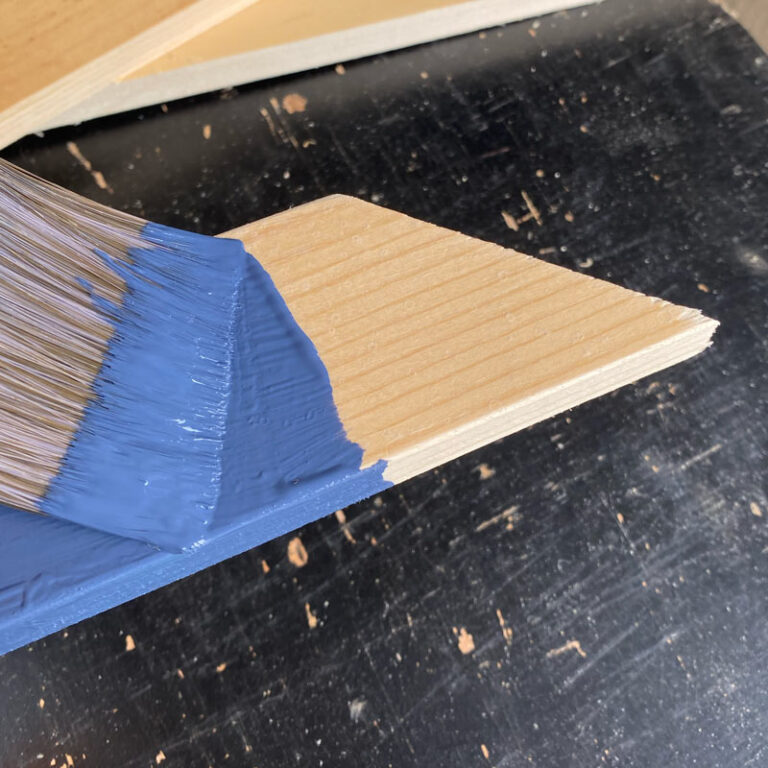
5. Paint or Stain
Let your personal aesthetic and distinct style shine through by painting your frame. Use fun paint colors that complement your mural or opt for a rustic appearance with a classic wood stain. You may also choose a timeless black, white, or brown, which can be reused again and again.
6. Glue Frame Together
Ensure the molding is completely dry before proceeding with glue. Apply wood glue to the mitered edges, using a small brush or a toothpick to spread a small amount of glue thinly along the mitered edges. This helps to avoid an excessive squeeze-out, which could result in wet glue seeping out, and then drying on your molding.
Press the corners together firmly, checking for alignment and squareness before the glue sets. Clamps can be used to apply gentle pressure and hold the pieces in place. If excess glue emerges, wipe it off gently with a moistened rag, then allow the frame to dry as recommended, usually overnight.
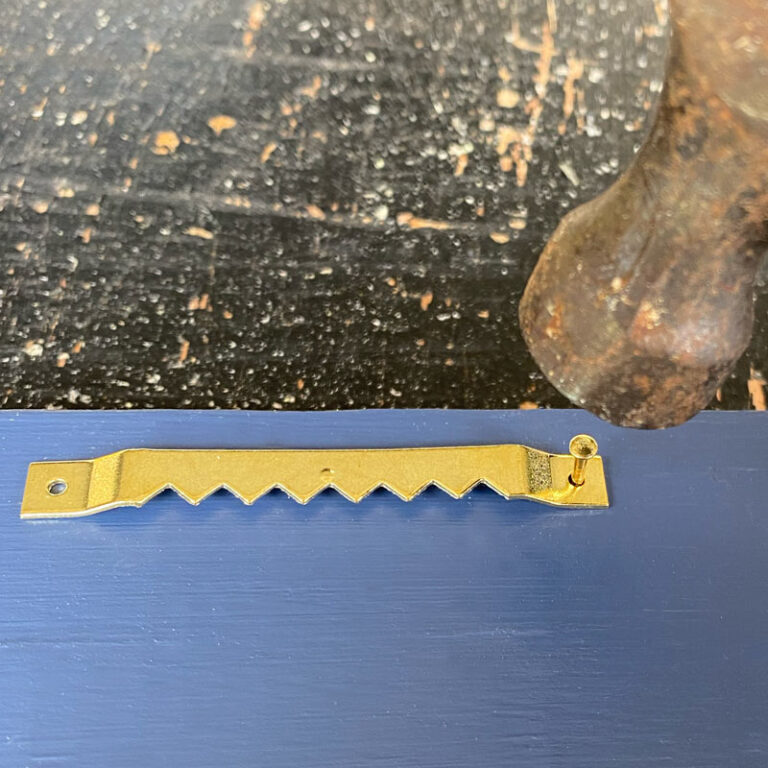
7. Secure the Frame
Optionally, staple each corner with three staples using your staple gun. Place the staples strategically for maximum support without being overly visible. This step provides for an extra secure hold. For larger murals, adding corner brackets can offer additional stability.
8. Attach the Hanger
Center the picture hanger hardware on the back of the frame for balanced hanging. For heavier pieces, a wire hanger that distributes weight evenly is recommended. Secure the hardware or wire ends with screws that penetrate deeply into the frame but not through to the other side. Test the hanger to ensure it’s securely attached.
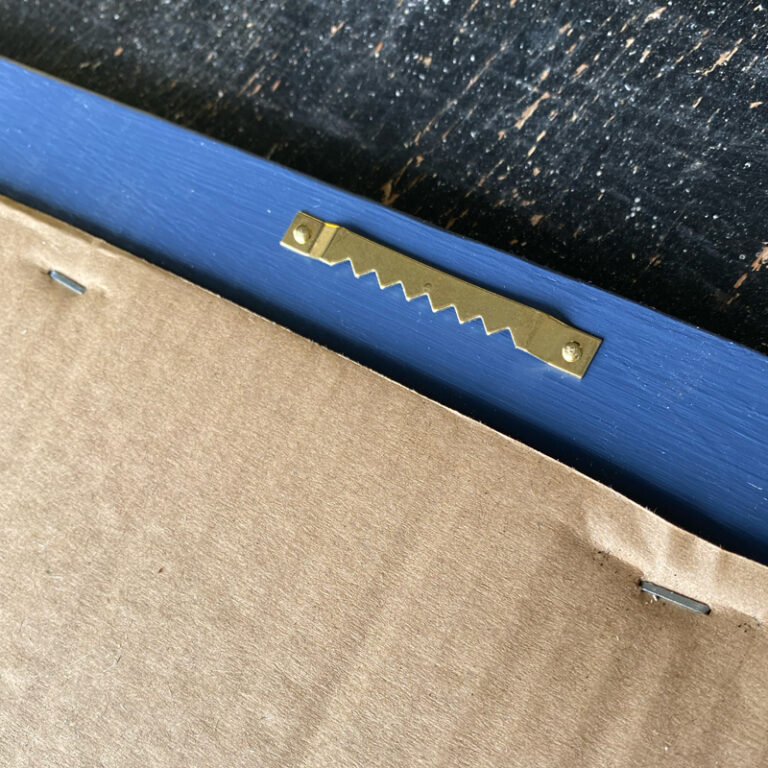
9. Create the Backing
For the backing, cut a piece of cardboard or foam board to match the mural’s dimensions. Foam board is lightweight and offers a smooth surface, ideal for larger pieces, while cardboard can provide a sturdier base for smaller frames. A utility knife and a straight edge or ruler can help achieve clean, straight cuts.
10. Assemble & Hang Your Framed Mural
Lay down the backing on a clean, flat surface. Ensure your wall mural is aligned, and adhere it to the backing using adhesive. Next, place the frame over the mural and backing, adjusting for alignment. Use your staple gun to attach the backing to the frame. Space your staples evenly around the perimeter to ensure the backing is firmly and uniformly secured.
Optionally, seal the back of your DIY wall mural frame with craft paper attached using double-sided tape or glue. Cut a piece of craft paper slightly smaller than the frame’s dimensions, and attach it using double-sided tape or a thin bead of glue along the frame’s edge. This step adds a layer of extra protection for the artwork, helping to keep out dust.
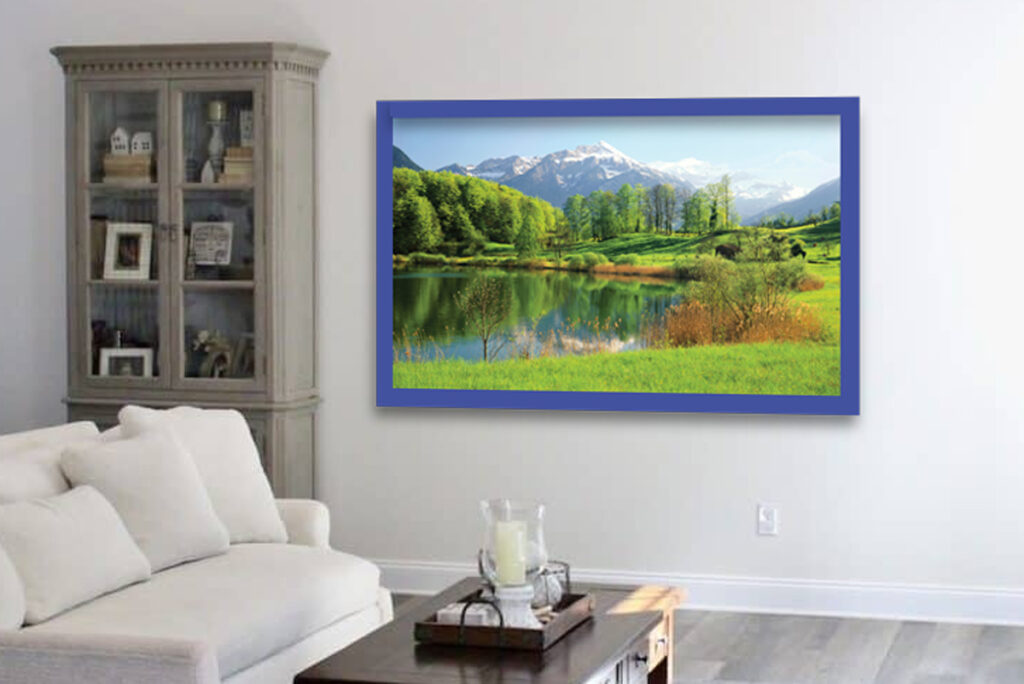
With your DIY framed Biggies Wall Mural now ready to adorn your walls, choose a spot with optimal lighting and visibility, showcasing your hard work in the best possible way.
To hang it, you may use a level to ensure it’s straight, marking the spot for your nail or hook with a pencil. If your framed mural is particularly heavy, wall anchors or a stud can provide additional support.
Final Thoughts: Congratulations on completing your DIY framed Biggies Wall Mural! This project not only enhances the aesthetic of your space but also demonstrates your creativity and skill. Whether it’s a focal point for conversation with guests or your own personal source of daily inspiration, this DIY wall mural frame reflects your artistic vision and dedication. Enjoy the transformed view, elevated style, and the personal touch it adds to your space.