Window Well Scenes Installation Instructions
Window well covers or grates are recommended for more years of enjoyment of your Window Well Scenes® product. Extreme cold temperatures will make Hook & Loop fasteners not adhere to metal window wells, test before applying.
Written instructions below the video.
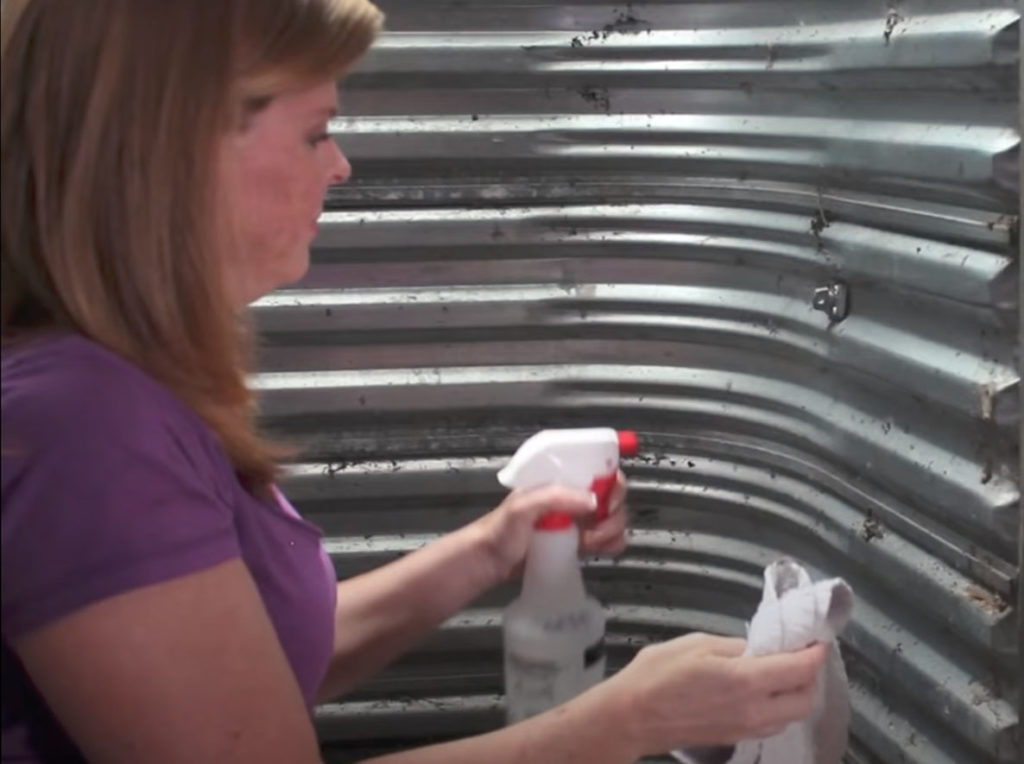
1. Prepare Your Window Well
Remove any debris from your window well like leaves and twigs. Clean the window well walls with rubbing alcohol or other appropriate solvent to remove any residue where the adhesive strips will be placed. Remove a few inches of rock or other material (if applicable) from the bottom of the window well. This will make it easier to roll out the scene and the rocks once replaced will help anchor it. If your window well is especially deep, plan so that about one inch of rock covers the bottom edge of the liner. Don’t be concerned if the liner doesn’t reach the top rim of the well; the top cannot be seen from the room.
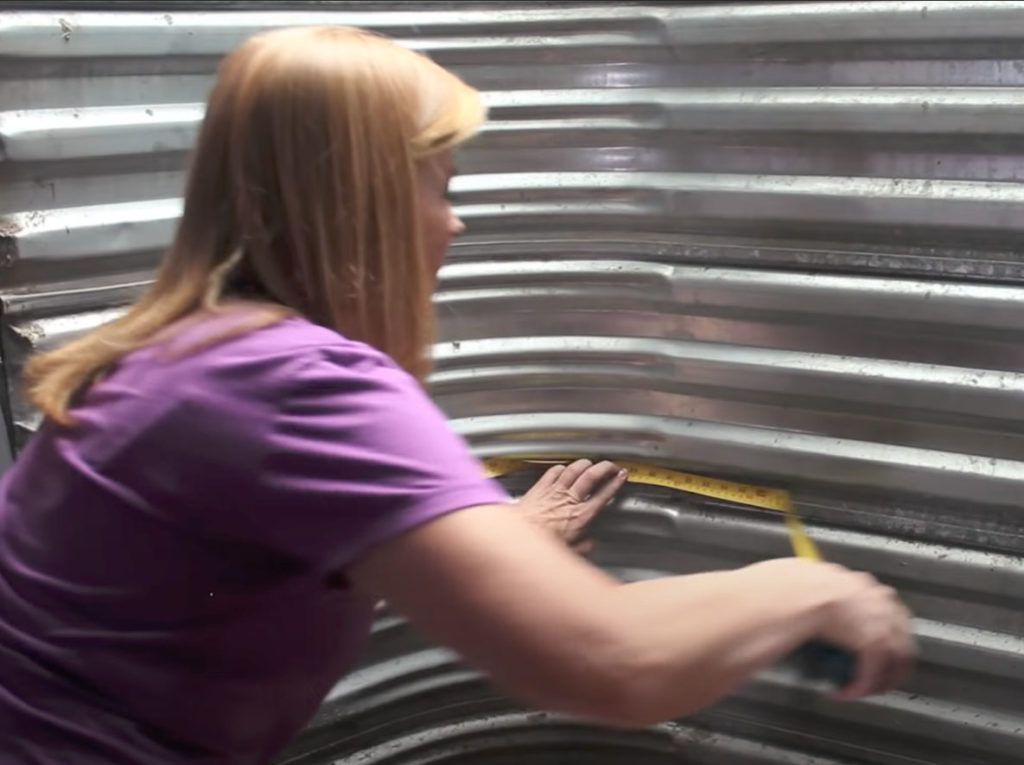
2. Measure and Crop Your Scene
Measure your window well from the top to the bottom (height) and from side to side (width) to check for plumb. When measuring the width, be sure to bend your tape measure against the entire width wall to account for the curve. Be generous with your measurements; the curved dimension may be difficult to measure perfectly. You can always trim more off, but you can’t add any back! Lay your scene image side up on a flat surface. Anchor the corners with something heavy if needed. Mark your window well measurements to select the area that looks best for your window well.
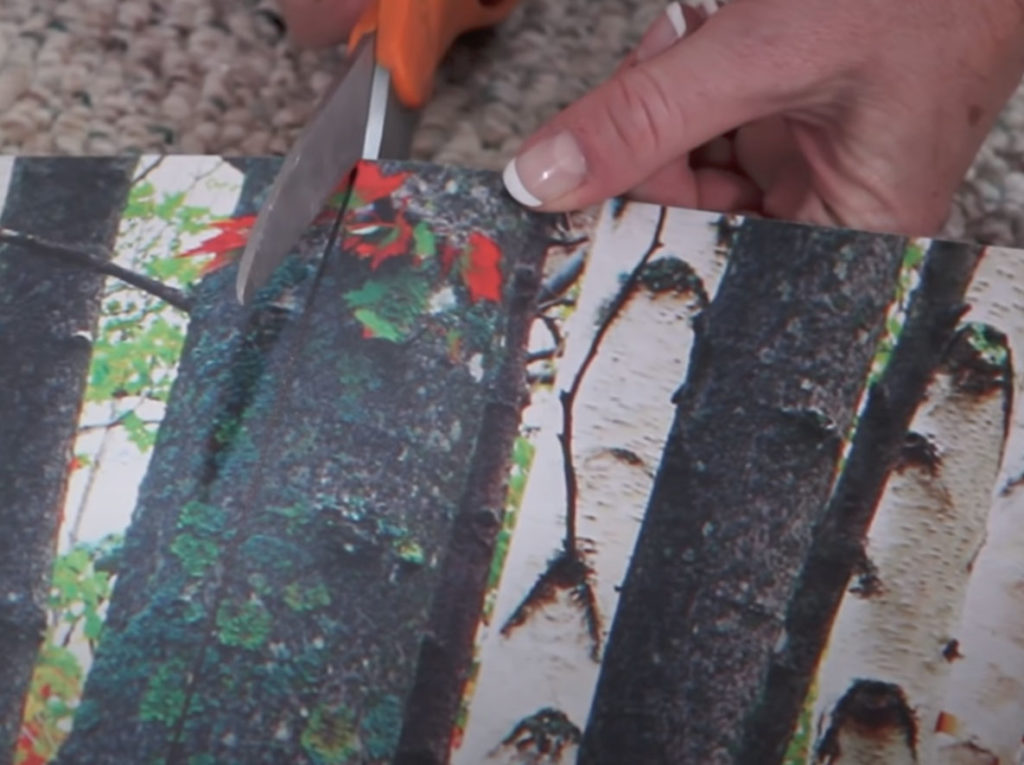
3. Trim to Size
Using a straight edge and a sharp blade/utility knife, or using appropriate scissors, carefully cut along the lines you made in Step 2. Protect the surface underneath the panel with a piece of wood or cardboard to avoid damage from the blade. Place the liner into the window well along the curve to make any final size adjustments.
4. Attach Your Window Well Scene
Attach the individual paired hook & loop fasteners to the window well on the ridges that jut out. Avoid placing pieces on any rusted areas. Leaving both sides connected as well as the backing paper, attach the strips to the metal. Put four pieces down each side being sure to hit the spots where the corners will be, four down the middle, and three down each curve. Put the remaining two pieces along the top edge. Starting on the free side of the rolled liner, remove the remaining backing paper from a set of fasteners. Start rolling out the liner, and apply pressure through the liner where the fasteners are.
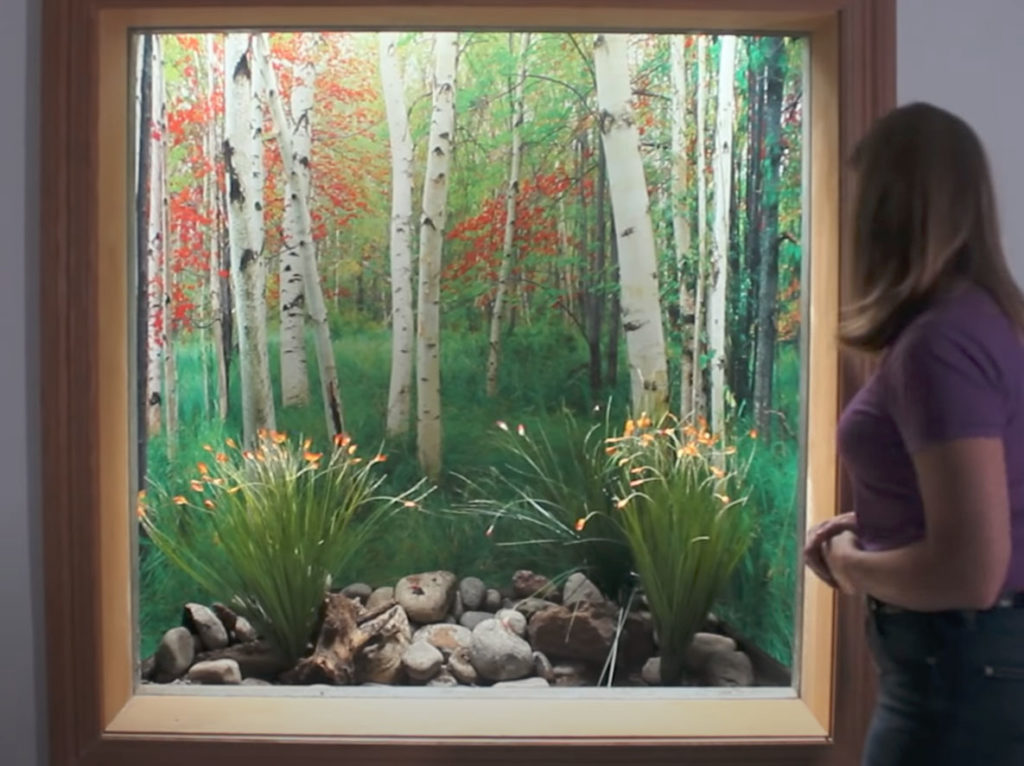
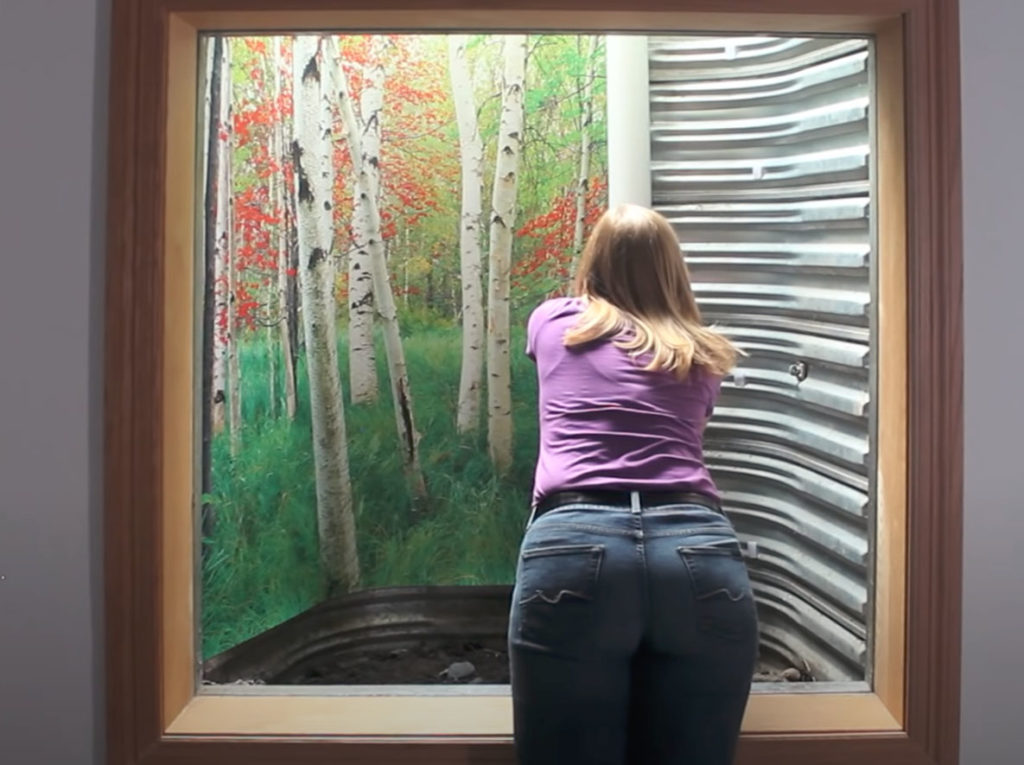
5. Finish and Enjoy the View!
Replace the rock or other material in the bottom of the well to cover the bottom edge of the liner. You can now add any desired decorations like larger rocks, driftwood, trinkets, or plants to personalize your scene. Stand back and admire the dramatic change in your view. Enjoy!
Biggies, Inc. neither assumes nor authorizes any person or entity to assume for it any obligations or liabilities not expressly stated herein.
PRODUCT LIMITED WARRANTY. The product is warranted by Biggies, Innovations for one year from date of retail purchase to be free of manufacturer’s defects in material and/or workmanship, including fading of the original image. Components and materials not manufactured by Biggies Innovations are warranted only to the extent of the original manufacturer’s warranty. The sole obligation of Biggies Innovations under this limited warranty is to replace or repair FOB Denver, at the option of Biggies Innovations any part which, in the sole opinion of Biggies Innovations, is defective. Under no circumstances will Biggies Innovations be responsible for mis-installation of the product.
This warranty is made in lieu of all other warranties, expressed or implied, including, but not limited to any implied warranty of merchantability and/or fitness for a particular purpose o ruse. There are no warranties express or implied beyond the description of the product on the original product packaging. Biggies Innovations expressly disclaims liability for incidental, special, or consequential damages of any nature. Biggies Innovations specifically disclaims any liability arising from owner’s failure to maintain the product. Replacement of parts or modification of the original product will void this warranty.
IMPORTANT NOTE: Removing or covering up an escape ladder is not recommended, please use your own judgement.
©Biggies Innovations, A Handi-Products Company – 2021