Transforming Extra-Wide Window Wells: Seamless Installation of Biggies Window Well Scenes
Transforming a basement window well into a stunning feature can make all the difference in creating a welcoming and stylish space. But what do you do when your window well is extra wide, exceeding 120” width? The solution is simple: order two complementary window well scenes and splice them together.
This guide will walk you through the process of measuring, ordering, cutting, and blending two scenes into a cohesive look that turns your oversized window well into a show-stopping masterpiece. Along the way, you’ll find creative window well ideas and window well decor ideas to enhance your space.
Why Choose Biggies Window Well Scenes?
Biggies Window Well Scenes are designed to breathe life into your basement by replacing drab views with vibrant landscapes or intricate designs. Whether you prefer the serenity of a forest, the rugged charm of brick, or the natural elegance of stone, these window well liners create a visual escape that elevates any room’s ambiance.
For wider wells, combine two identical or complementary window well scenes to customize your view and enhance your basement’s overall aesthetic.
Materials You’ll Need:
- Two Biggies Window Well Scenes of your choice
- Measuring tape
- Utility knife or sharp scissors
- Hook-and-loop fasteners (included with the scenes)
- Pencil or marker
- Adhesive or clear tape (optional for splicing preparation)
- Plants or decorative elements (optional for blending splices)
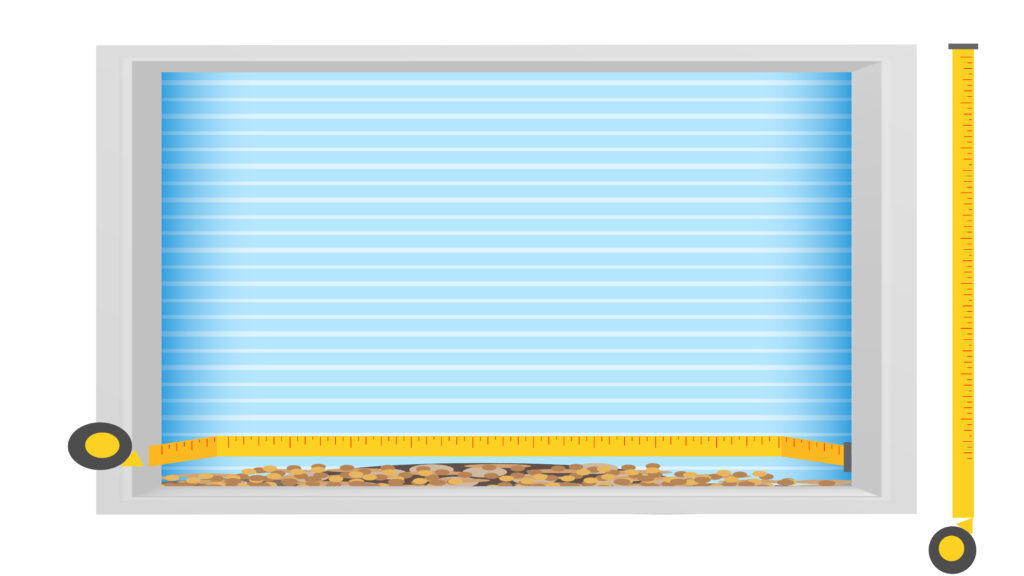
Step 1: Measure Your Window Well
Begin by measuring the total width and height of your window well. Since your window exceeds 120” in width, divide the measurement to determine how much coverage you need from two scenes.
For example:
- If your window well is 150” wide, each scene should cover approximately 75”.
- Add a slight overlap (1-2 inches) at the splice point to ensure a seamless connection.
Step 2: Select Your Scenes
You can choose either two identical murals for a perfectly cohesive look or two different scenes that naturally complement each other for a dynamic, yet still seamless design.
Identical Murals for a Seamless Transition
Patterns like stone and brick are popular choices for extra-wide window wells. Ordering two identical murals in these patterns creates a smooth transition across your window well, providing a polished and cohesive appearance.
Mix and Match for a Unique Masterpiece
You may also combine two different murals to furnish a dynamic and captivating display. Murals within the same theme, such as forest scenes, outer space designs, or aquarium liners, blend beautifully due to their shared color schemes and organic patterns. These similarities often make splicing virtually invisible.
Tips for Selecting Scenes:
- Repeating Patterns: Brick and stone designs offer continuity, making them easy to align and splice.
- Organic Designs: Nature scenes and other complementary landscapes blend nicely when matched at less detailed sections, such as trees or grass.
- Strategic Splicing: Don’t be afraid of choosing more intricate patterns, as strategic splicing can go a long way in providing a seamless look. Moreover, consider the placement of decor items, such as rocks and fairy lights, and how they can help obscure the seam.
Best-selling Mural Pairs:
- Celestial Wonders: First Deep Field & Stephan’s Quintet
- Underwater Submersion: Ocean Reef & Shark Reef
- Lush Golf Courses: Augusta National Hole #12 & Valhalla GC-Hole #7
- Rugged Terrain: River & Mountain
- Tranquil Golf Views: Laurel Valley GC-Hole #3 & Edgewood Tahoe GC-Hole #12
- Secret Garden Retreat: Flowers & Garden
- Coastal Escape: Beach & Island Cove
- City Skylines: New York & San Francisco
- Tropical Twilight: Sunset & Palm
- Lakeside Fairways: Congressional GC-Hole #10 & Harbour Town GC-Hole #4
Step 3: Plan Your Splice
Before cutting, identify the best location to splice the two scenes. Look for areas with minimal detail, such as solid-colored portions or less busy patterns. This will make the splice less noticeable.
Pro Tip: For more detailed scenes, plan the splice to fall behind a decorative element like a tall plant, piece of driftwood, or garden ornament.
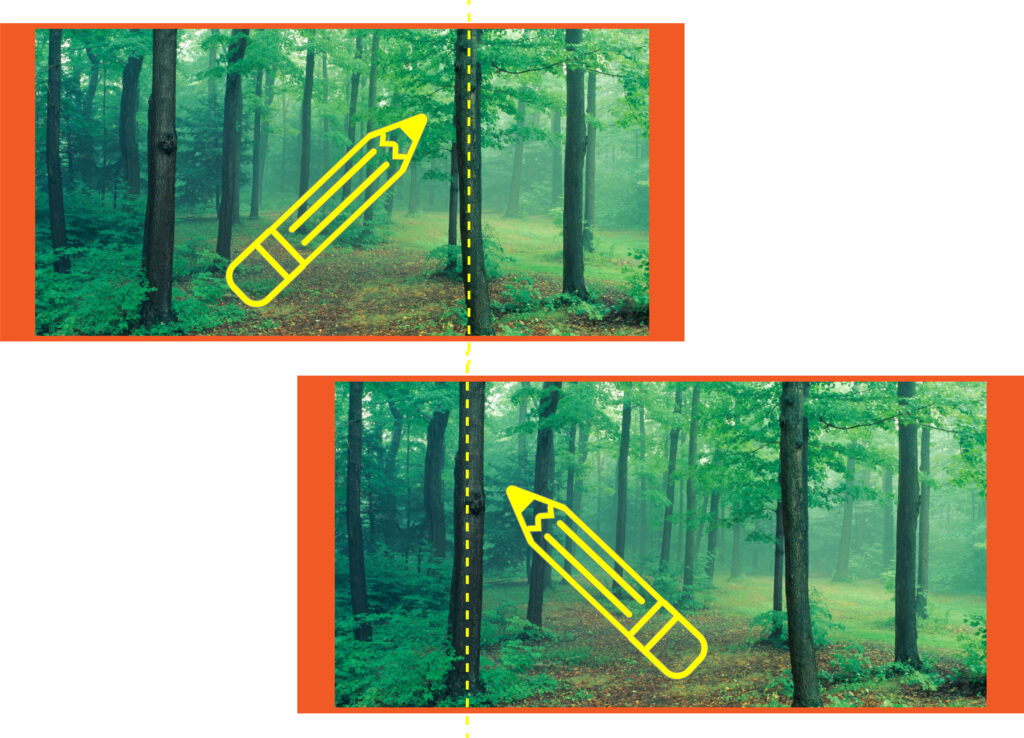
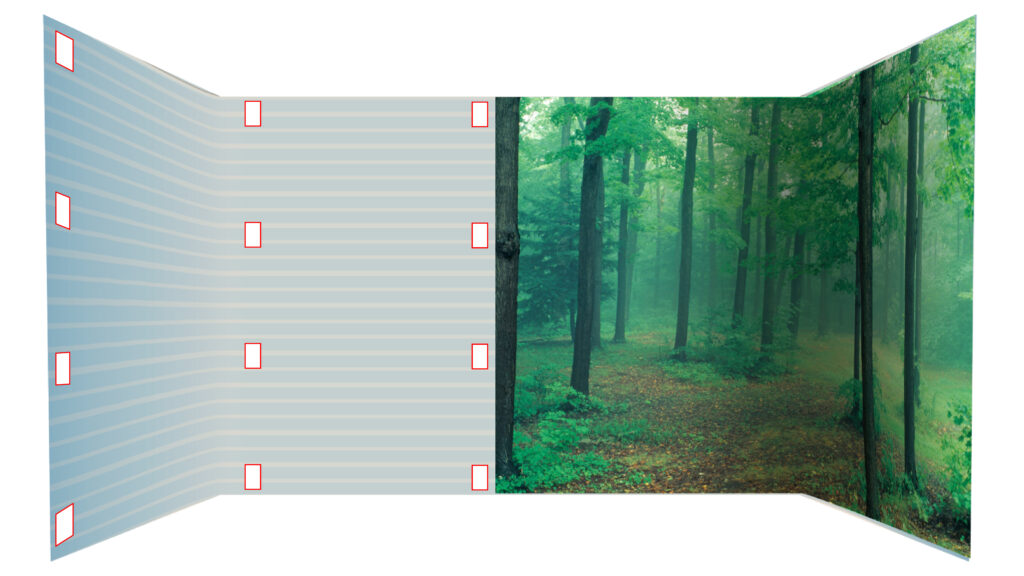
Step 4: Trim the Scenes to Fit
Lay each scene flat on a clean surface. Use your measurements to mark the dimensions of your window well on each scene.
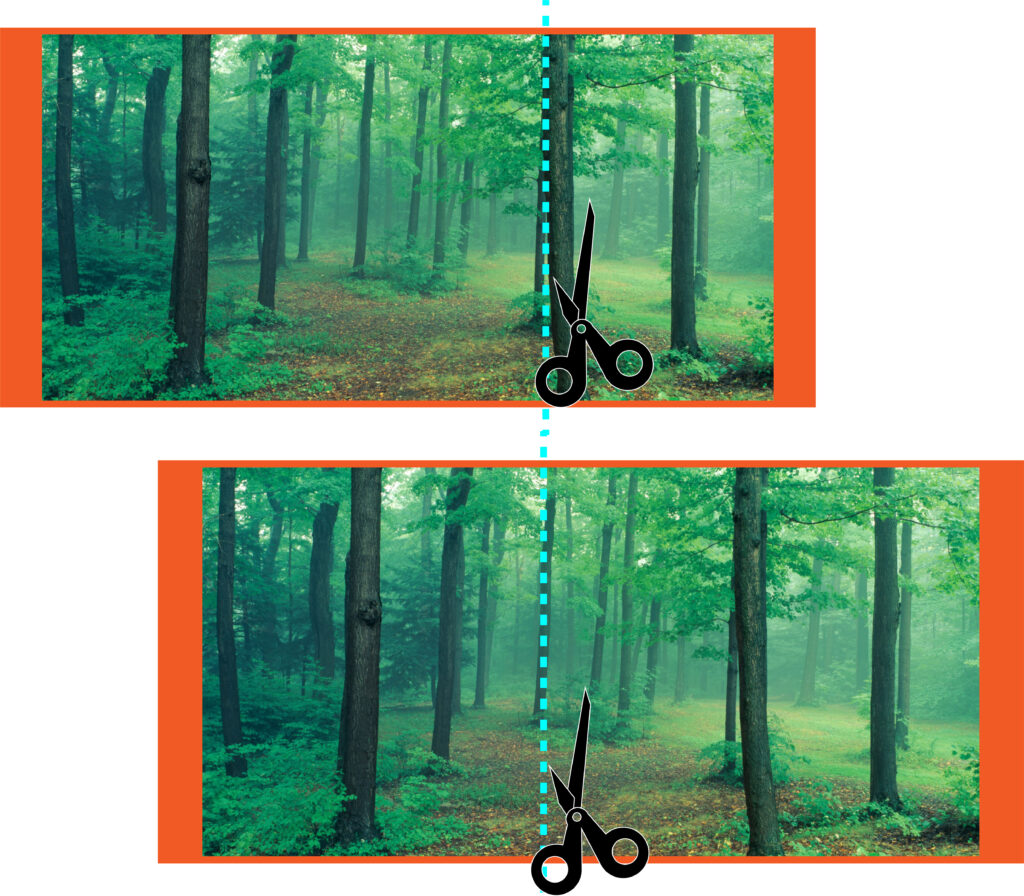
- Add 1-2 inches for overlap at the splice point.
- Use a utility knife or sharp scissors to trim the scenes carefully. Place cardboard or wood beneath to protect your cutting surface.
Step 5: Attach the First Scene
Start installing the first window well liner on one side of the window well:
- Use hook-and-loop fasteners to attach the liner securely to the well’s ridges.
- Smooth the liner as you go to avoid bubbles or wrinkles.
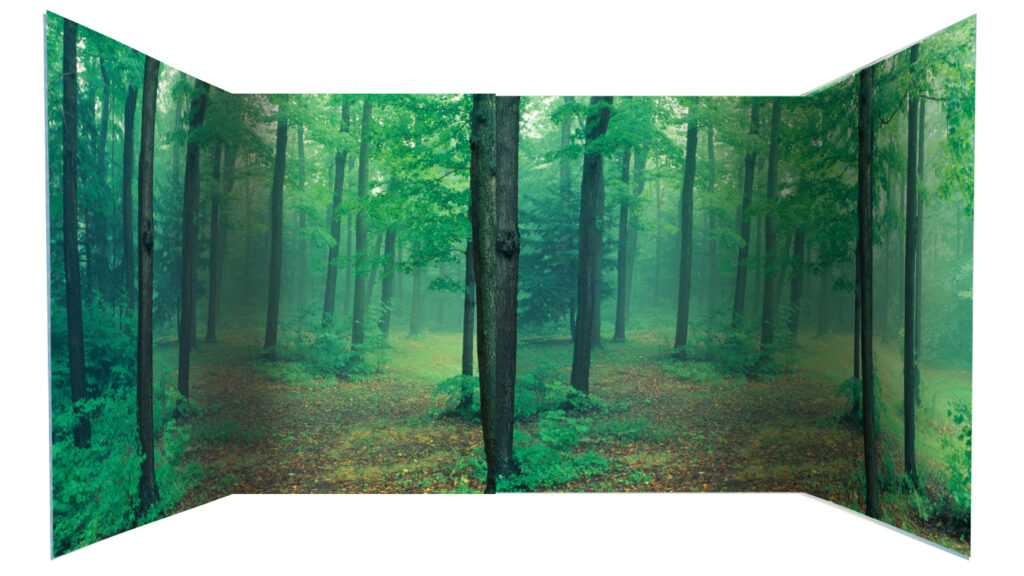
Step 6: Align and Attach the Second Scene
Place the second scene in position, aligning its edges with the first. For a seamless look:
- Overlap the edges slightly at the splice point.
- Adjust the alignment to ensure the patterns or details blend smoothly.
- Use clear adhesive or tape to hold the overlap temporarily while attaching the fasteners.
Step 7: Conceal the Splice
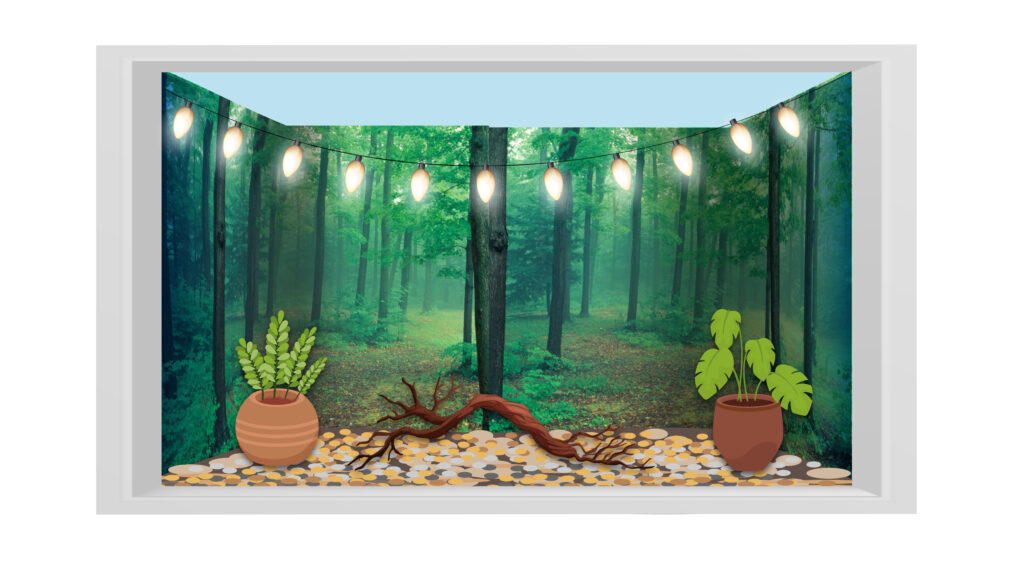
Consider placing decorative elements like plants and rocks near the splice for enhanced camouflage:
- Plants and Greenery: Add potted plants, vines, or hanging baskets near the splice.
- Decorative Rocks or Driftwood: Arrange these elements strategically to draw attention away from the seam.
- Solar Lights: String lights or soft lighting can subtly obscure the splice while adding ambiance.
Step 8: Finishing Touches
Once the scenes are securely attached and the splice is blended, step back and admire your work. Enhance the space further by incorporating other window well decor ideas like themed ornaments or custom rock arrangements.
Top Takeaways for Extra-Wide Window Well Scene Installation:
- Precise Measurements: Ensure you have the exact dimensions of your window well for an accurate fit.
- Complementary Mural Selection: Opt for patterns that coordinate well together and which are forgiving when spliced.
- Thoughtful Decoration: Use plants, lights, or other elements to enhance the look and mask any seams.
With a bit of creativity and these simple steps, you can transform even the widest window well into a stunning focal point. Biggies Window Well Scenes are here to help you reimagine your space with eye-catching window well ideas and decor solutions.