Home Improvement, Room With A View
How to Create Faux Window Frame with Biggies Wall Murals
Posted on by Robin Ottenfeld
23
Feb
Feb
DIY Panorama: Crafting a Faux Window with Biggies Wall Murals
Does your room need a little more… window? Maybe your basement window is super tiny, or you’re saddled with the windowless office space at work. No matter your situation, with a dash of DIY enthusiasm and the perfect Wall Mural, you can transform any plain, lifeless wall into a breathtaking view.
There’s an endless array of home decor ideas aimed at optimally arranging your furniture to maximize visual space. However, if you’ve grown weary of constantly shuffling furniture around, this easy DIY window frame may be just the project to create the sensation of openness while rejuvenating your space.
This step by step guide details how to adorn a wall with your favorite mural and a homemade, custom frame. With Biggies Wall Murals you can create a picturesque scene that not only enhances the room’s aesthetic but also infuses it with the illusion of an additional window.
Materials:
- Lumber – For the frame.
- Biggies Wall Mural – The centerpiece.
- Tape Measure – For accurate measurements.
- Wood Glue – For assembling the frame.
- A Sander or Sandpaper – To smooth the wood.
- A Hand Saw or Table Saw (Circular, Miter, or Chop Saw) – For cutting lumber.
- A Hammer or Nailer – For assembly
- Nails – For securing frame pieces.
- Pocket Hole Jig with Screws – Ensures a strong frame.
Optional Materials:
- Wooden Plugs – For a more finished look by concealing screw holes but not essential for the structure.
- Screwdriver – For any additional hardware installation, which might be optional depending on the chosen method of assembly.
- Primer – Prepares the wood for painting.
- Glossy White Paint – For the final finish.
- Paintbrush – For applying paint.
- Jigsaw – For detailed cuts or adding optional design elements like a window sill.
Your 7 Step Guide to Building the Perfect Faux Window:
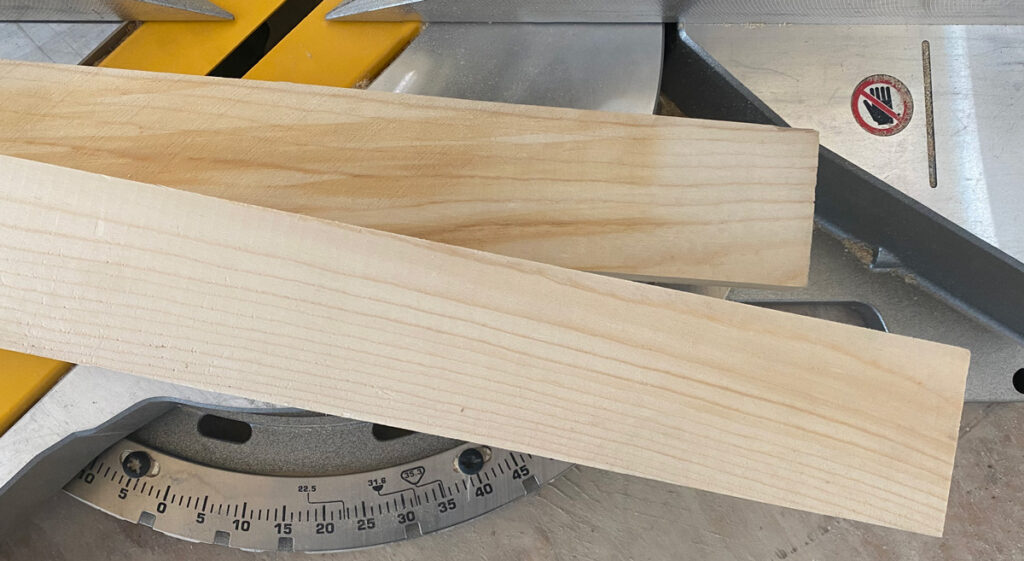
Step 1: Measure and Cut the Lumber
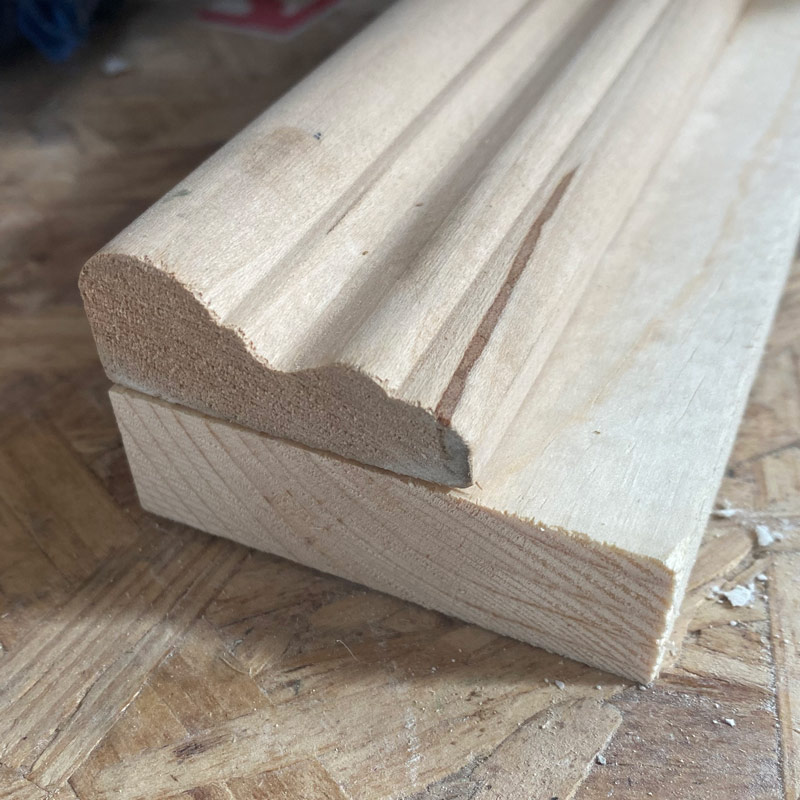
Decide the size of your faux window frame based on the mural dimensions. Then, using a tape measure and a saw, carefully measure and cut two pieces of lumber for the sides of the frame. These side pieces will be the same length as the height of the mural.
Decide the size of your faux window frame based on the mural dimensions. Then, using a tape measure and a saw, carefully measure and cut two pieces of lumber for the sides of the frame. These side pieces will be the same length as the height of the mural.
Next, cut two pieces for the top and bottom of the frame, measuring for the width of the mural, plus twice the actual width of the side lumber pieces, and make precise, clean cuts. Remember, accurate measurements are key to ensuring a perfect fit for your faux window.
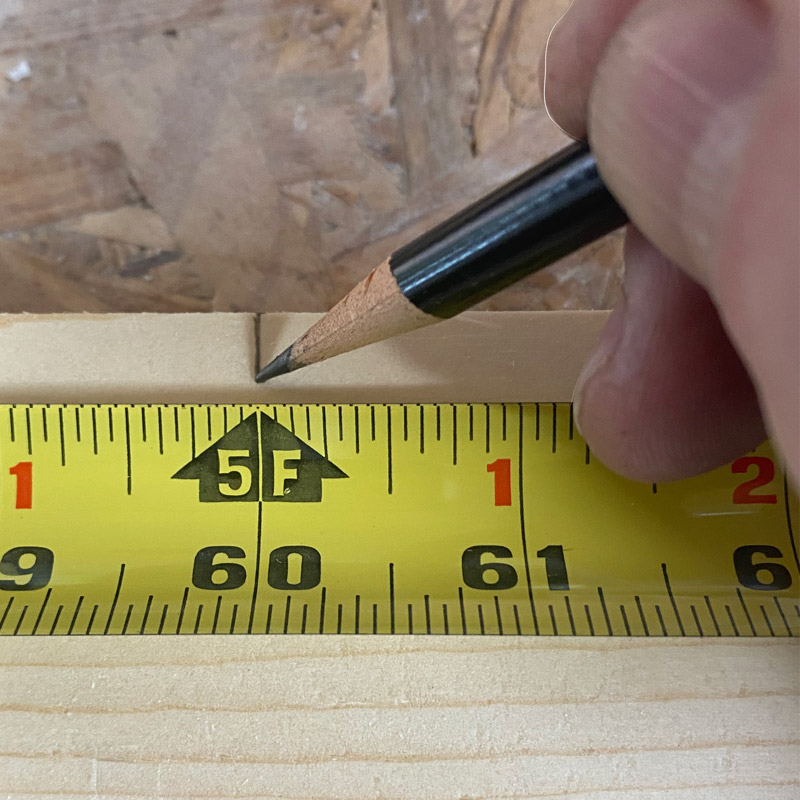
If you are a little lost with that explanation, here’s a more detailed version of the above step for a frame surrounding a 120-inch by 60-inch mural:
- Sides (Vertical Pieces): For the sides of the frame, you will measure your lumber to match the mural’s height. Therefore, for the 120-inch wide by 60-inch tall mural, you’ll cut 2 pieces of lumber to 60 inches.
- Top and Bottom (Horizontal Pieces): The top and bottom pieces need to span the width of the mural plus the width of both side pieces of lumber to ensure the frame encloses the mural properly. To calculate the total length of the top and bottom pieces of your frame, you’ll add the mural width and twice the actual width of the lumber (since there are two pieces). If you are using 1×3 lumber, then the actual width is approximately 2 1/2 inches each (see the lumber terminology tip below for further explanation). Therefore, for the 120-inch mural, the top and bottom pieces will measure approximately 125 inches (120 + 2 ½ + 2 ½).
Lumber tip: The numbers describing the lumber refer to the nominal size of the wood when it is first cut, before it is dried and planed (finished). For the “1×3” dimensions, the “1” represents the thickness in inches, and the “3” represents the width in inches. The “actual size” reflects the width and thickness when finished, which for 1×3 lumber, is usually 0.75×2.5.
Additionally, remember that your Biggies Wall mural can be cut to fit the size of your frame. If your frame is a little more snug, and the edges of the mural are creeping out, feel free to trim it to size.
Step 2: Sand & Assemble Your Frame
After making cuts, sand the wood down, making it smooth to the touch. You can use an electric sander, if you have one, but a sanding block from Home Depot will work just fine.
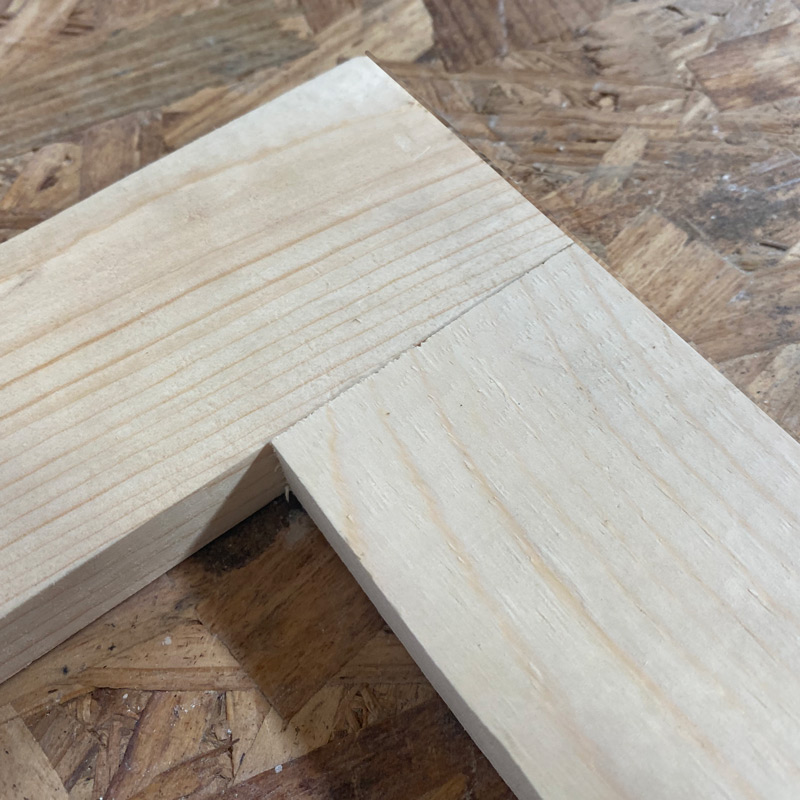
Arrange the 4 pieces into a rectangle with the two shortest pieces on the inside, and the longer pieces on the top and bottom. Next, attach the 4 pieces of your frame together. There are various methods you could use, but a pocket hole jig, screws, and wood glue will provide a secure attachment. Place two screws on each bottom joint and three on the top, finally securing the pieces of your frame together with glue.
Alternatively, you use wood glue alone, which can be completely sufficient for lighter pieces of wood catered to smaller murals.
Step 3: Crafting the Recess
The goal here is to construct a ledge within the frame where the mural and its backing board can sit flush against the front, giving the appearance that the mural is actually a view through a window.
There are many ways to make a recess, but here is our favorite method:
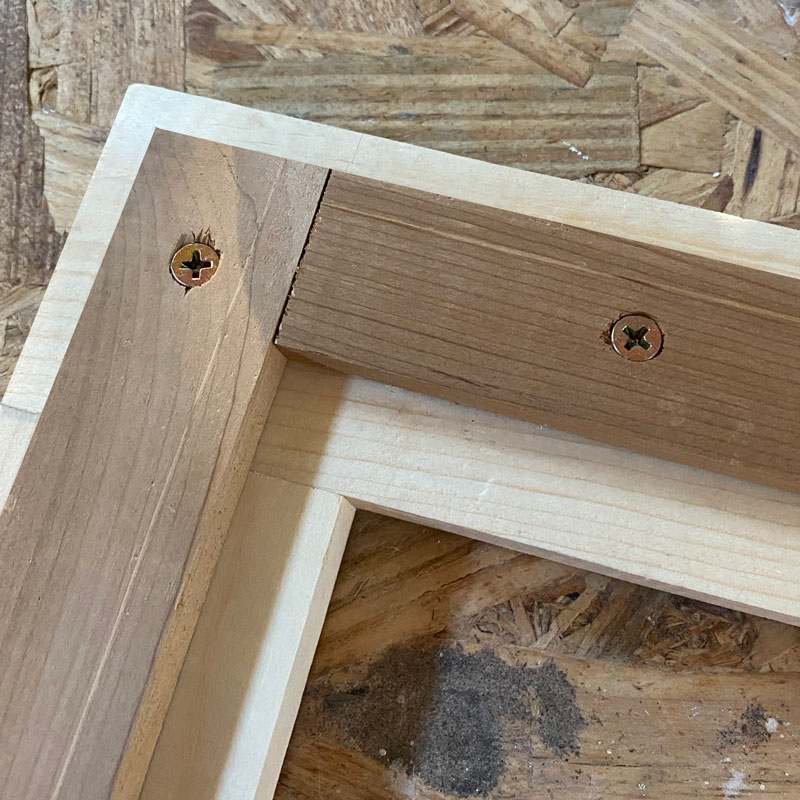
You’ll need four additional pieces of wood to form the recess, where the mural will sit. You’ll cut four pieces of wood, each of these narrower than your original frame, and then attach these pieces to the back of your original frame.
Apply wood glue to each piece and secure it with nails or screws. For lighter, smaller frames, the glue alone will be sufficient. Ensure it’s centered and level. For larger frames, add small wooden blocks or brackets at the corners for extra stability. If you plan to use a French Cleat for hanging, be sure to leave space for it when you construct this recess.
Step 4: Add a Cornice for Character
Optional: Transform your wooden picture frame into a distinct window sill. Constructing a window sill lends authenticity to your faux window and will provide a place for decorative items or plants. Cut a board to the width of your frame plus a few additional inches so it extends beyond each side of the frame. Round off the external corners with a jigsaw to soften the edges, mirroring the gentle curve of traditional window sills. Secure the sill to the bottom of the frame using wood glue followed by screws, ensuring it’s perfectly level for a polished look.
Step 5: Constructing a Window Sill
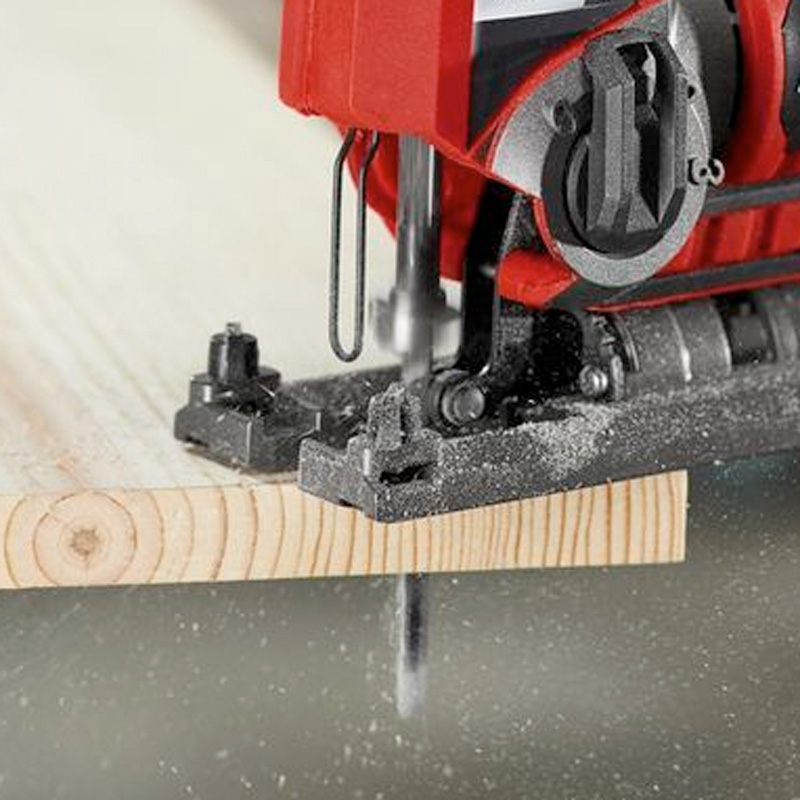
Optional: Transform your wooden picture frame into a distinct window sill. Constructing a window sill lends authenticity to your faux window and will provide a place for decorative items or plants. Cut a board to the width of your frame plus a few additional inches so it extends beyond each side of the frame. Round off the external corners with a jigsaw to soften the edges, mirroring the gentle curve of traditional window sills. Secure the sill to the bottom of the frame using wood glue followed by screws, ensuring it’s perfectly level for a polished look.
Step 6: Bring your Frame to Life with Color
Before painting, feel free to fill any nail holes with wood filler and allow it to dry. Also, ensure your wood is sanded down.
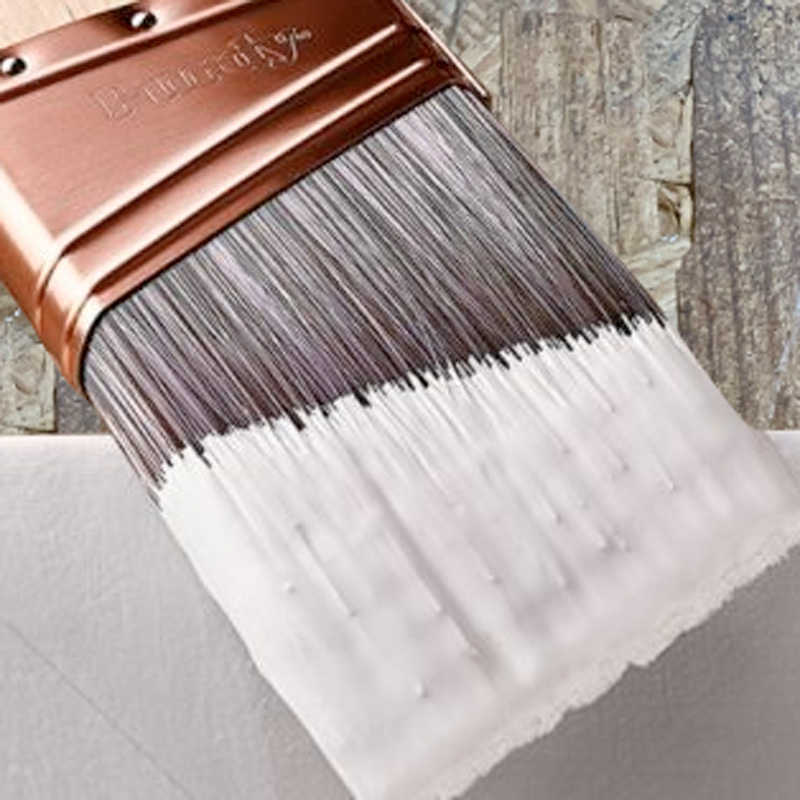
Apply a coat of water-based primer to the entire frame, doors, and sill, allowing it to dry completely. Lightly sand the primed surfaces for optimal paint adherence. Finish with two coats of water-based gloss white paint, sanding lightly between coats to achieve a flawless, durable finish that enhances the brightness of your space.
Step 7: Placing Your Mural
Placing your mural is the final step of this easy DIY project. Bring your faux window to life by adding your favorite view, whether that be snowy mountains hovering over a crystalline lake or an idyllic Hawaiian sunset at the beach. If you haven’t already, add your chosen Biggies Wall Mural onto a plywood piece cut precisely to fit the recessed area within your frame. This visualization step is crucial for ensuring the final placement meets your expectations. Once satisfied, affix the mural to the plywood backing, either with adhesive suitable for the material or with small tacks or nails for easy replacement in the future. Carefully insert this assembled piece into the frame’s recessed area, securing it in place if necessary.

For hanging, there are several different methods to choose from. If your project is between 5 to 20 pounds, drywall anchors are a great option. For a more secure placement, you may also consider utilizing metal wall anchors and studs.
By completing these steps, you transform a simple frame into a captivating faux window, perfect for showcasing a stunning floral wall mural or serving as a portal to a relaxing island. To further integrate your faux window, you can add a few finishing touches like a curtain rod and curtains. Adding a faux window brings light, depth, and personal style into any space. This DIY home decor project not only adds a decorative touch but also creates the illusion of openness, making it a rewarding addition to any room lacking in natural views. Enjoy the transformative effect of your new faux window and the elevated style it brings to your space.